An original stylish accessory is the best way to highlight your individuality and complement your look. But sometimes it so happens that you cannot find the necessary decoration on the shop windows. In this case, there is nothing better than beautifully assembling the beads yourself. This does not require any special skills or rare materials - you can make a decoration from ordinary things.
How to make beautiful beaded beads: the simplest schemes
The easiest way to collect beads is beads. But even this simple option in many cases looks very impressive and beautiful. The jewelry is made of threads and beads, so you need a minimum of materials.
Before making beads, you should look for an approximate version of what you want to do, estimate the dimensions and choose the material. Beads can be made from plastic, metal, wood, or natural stones. The most affordable material is considered to be plastic, especially since there is a huge selection of colors and shapes.
You need to measure the length of the jewelry in order to approximately calculate the number of beads. So that you don't have to buy them later, be sure to take them with a margin.
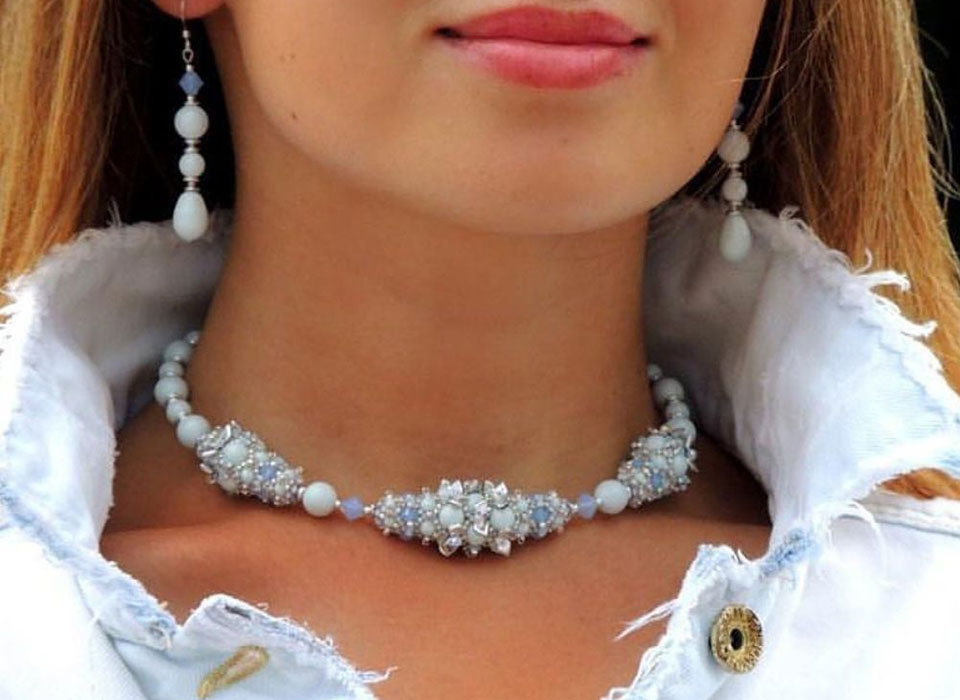
There are many options for such decoration. Shown below is one of the simplest weaves with alternating contrasting beads.
For work you will need:
- beads of different colors and sizes;
- waxed cord - check that you can easily string the beads;
- scissors;
- a needle with a large eye;
- lighter;
- connecting ring;
- protectors - special protection against thread abrasion;
- pliers;
- lobster clasp.
You can do without protectors, but this way the decoration will last much longer.
How to make beads:
- Thread the cord through the needle and make sure the bead can be strung freely. If there is no such needle, you can make an oblique cut on the thread with scissors and singe it so that the edge does not fluff.
- Alternating beads of different colors and diameters, string them onto a cord. You don't need to trim it yet.
- After collecting all the elements, move them away from the beginning of the cord by 5 cm.
- Thread the thread through the protector and tie a knot. Cut off the excess knot.
- Put the fastener on the protector, and then clamp it with pliers.
- Repeat on the other side, but with the connecting ring.
The decoration is ready! Such simple beads can be complemented with more strands with beads, make them asymmetrical or add interesting details. Experiment and you can create a unique product with an original pattern.
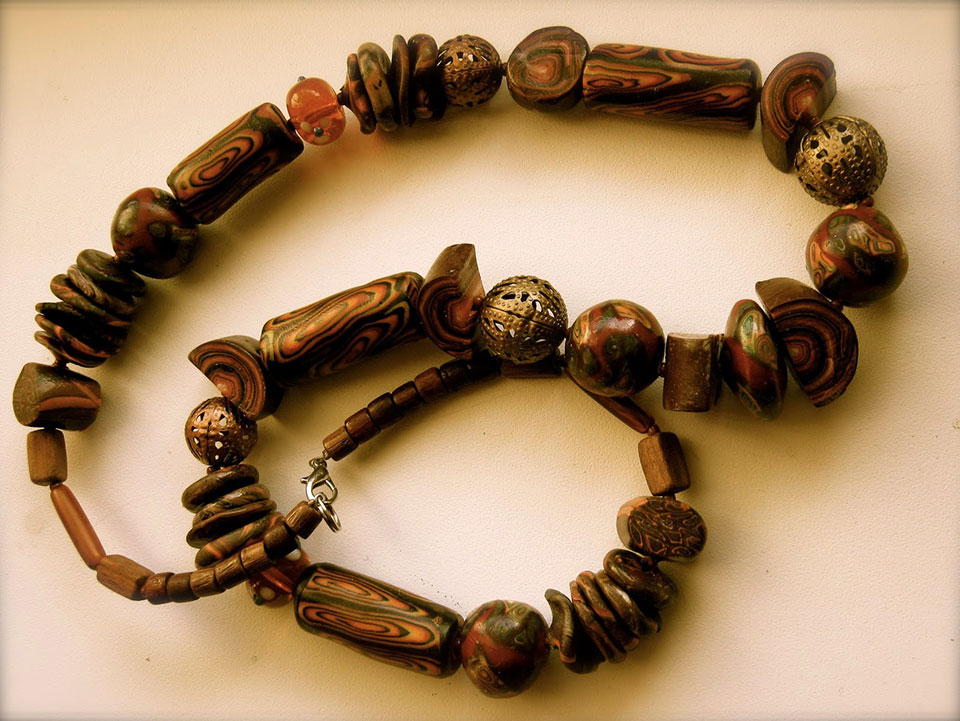
In addition, you can make your own beads from polymer clay or cold porcelain. To do this, you need to make balls of the same shape and pierce a hole in them with a needle. Then follow the manufacturer's directions - usually, polymer clay must be baked to harden, and the porcelain must be left in the air for a certain amount of time.
How to make beads from fabric with your own hands: a master class for beginners
This product will make your look bright and unique. Making beads from fabric is very simple, just read a couple of master classes and you can create your own accessory.
There are several options for fabric jewelry, all of which are easy to make. For this reason, it is worth considering step by step all 3 types of fabric beads.
Multi-tiered
Most often, African technique is used to create multi-tiered jewelry - beautiful products are obtained in the boho or ethnic style.
For work it is necessary:
- bright matching fabric or multiple fabrics;
- several pieces of nylon cord of different diameters;
- a thread;
- needle;
- round teeth;
- fastener and all the accessories necessary for it.
Production procedure:
- Cut the thick nylon cord to the desired length.
- Make a tube of fabric so that its diameter matches the size of the cord.
- Turn the tube inside out and sew with any sturdy, comfortable seam.
- Turn right side up and pull the tube over the cord.
- Attach the clasp to the ends of the cord using round teeth.
To create a massive decoration, you can make several of these pipes of different thicknesses.
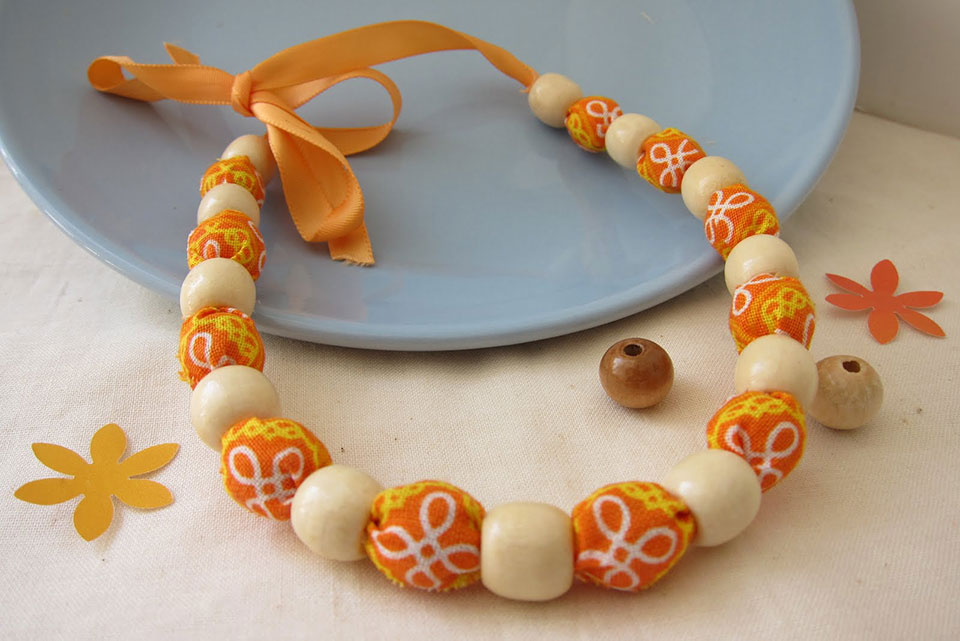
Decoration of "crumpled" beads
These beads will instantly catch your eye. Crumpled beads are usually used in conjunction with wood, glass or pearl elements. You can also use different fabrics - you get a very bright and unusual product.
Here's what you need to make these beads:
- small pieces of fabric, you can use the material in different colors;
- filler - synthetic winterizer, cotton wool or holofiber;
- a thread;
- needle;
- fishing line, thread or cord, the future base of the beads;
- clasp and fittings.
The process is simple, but requires patience and perseverance. The procedure is as follows:
- Cut mugs out of the fabric. Their diameter will match the size of the future beads. If you want all the beads to be the same size, the circles must be the same. If you are interested in making a bright piece of jewelry with different elements, the mugs should be different.
- Take one circle and sew along the edge with a seam so that you can then collect it in a kind of bag. Seamstresses call this seam basting.
- Pull it in half and place a piece of filler inside the bag. Make sure there is enough filler and tighten the ball.
- Sew the edges so that the bead holds tight.
- Now we bring the needle out from the other side through the entire bead. At a distance of about 2 mm, we make another puncture and bring it out to the edge where the fabric is most puffed up. Pull off the fabric and repeat several times. As a result, the bead will have many folds, which makes it appear wrinkled.
- Make all the beads this way.
- Now it's time to collect your jewelry. To do this, string the beads in a specific order on a fishing line or cord, piercing them with a needle.
- Secure the clasp and all necessary hardware.
Creation of "crumpled" beads is an interesting but long process, so turn on music or your favorite movie and enjoy the process!
Denim
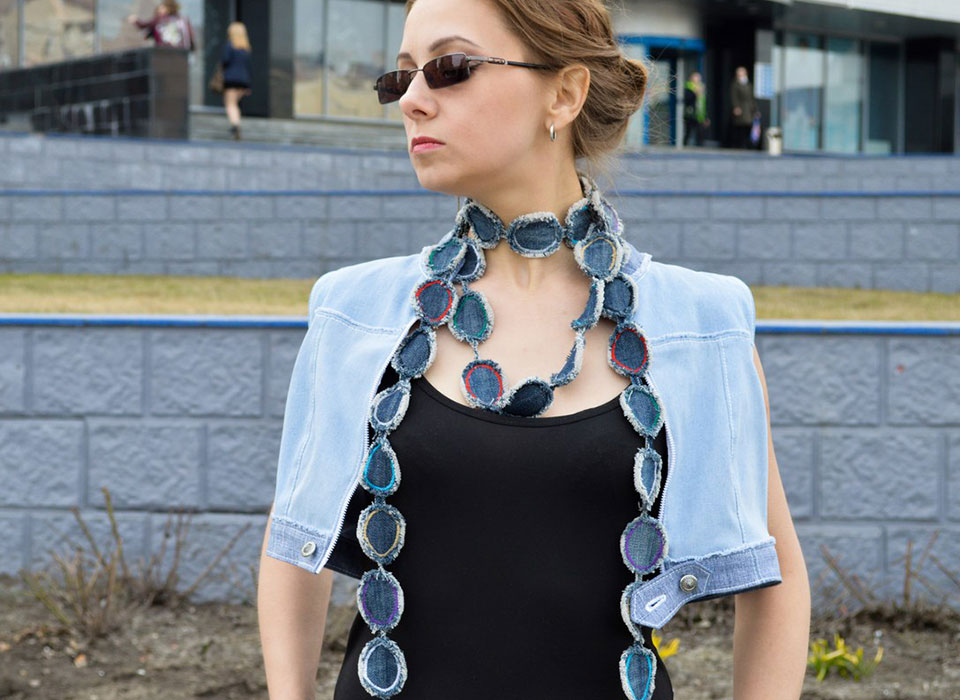
If you have a pair of old jeans at home that are a shame to throw away, use them to create an original decoration. The technique is so simple that a child can easily cope with it, and the result is beautiful, casual beads.
What you need to create a denim product:
- jeans shreds;
- thin wooden stick;
- thread or cord, which will be the basis of the decoration;
- clasp;
- glue.
You can also add various decorative elements: glass, wood and plastic beads, ribbons and much more.
How to complete the decoration:
- Cut into strips of denim. Their width will correspond to the height of the beads.
- Wrap the strip tightly around a wooden stick and make sure the post is straight.
- Stick on the end of the fabric and secure it. Wait for the glue to dry.
- Pull the stick out gently. The cylinder is ready.
- Now you can decorate it as you wish. For example, you can tape it over and add a few small beads.
- Repeat with all beads.
Then, from such denim barrels, you can assemble an interesting product, complementing it with other decorative elements. You can string the keg using the hole in the middle, and fasten the fastener at the ends of the cord.
The same barrels can be made of felt and any other non-thin material.
How to make sling buses?
Sling beads are an adornment that consists of ready-made beads covered with fabric. Most often, wooden beads are used to create such a product, but you can also take plastic beads.
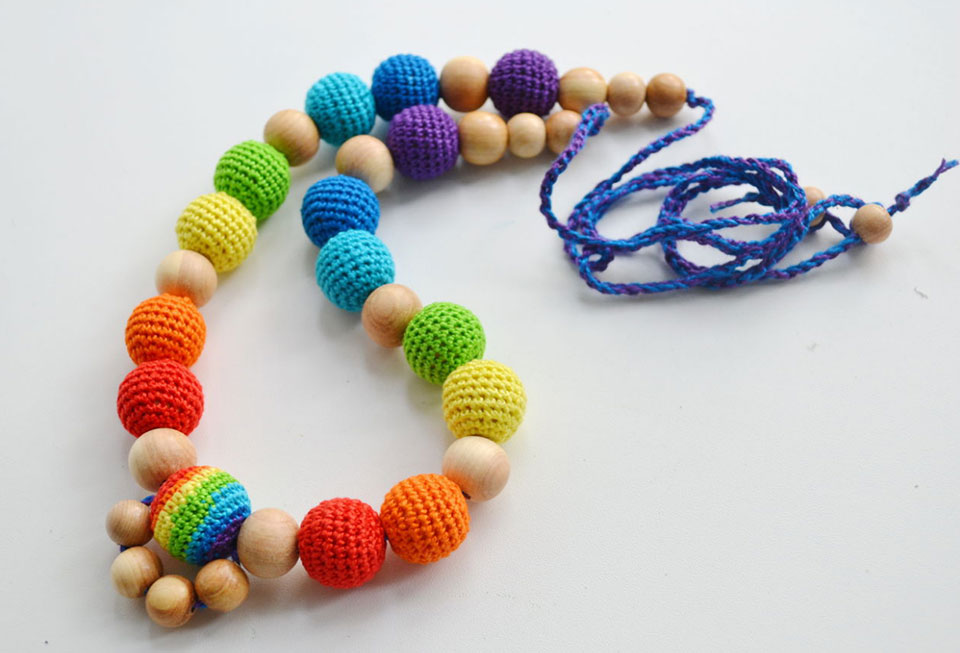
Materials:
- one piece of fabric;
- beads;
- thread with a needle or a sewing machine;
- lock - you can do without it.
Here's how to make this decoration:
- Sew a tube out of the fabric. Its diameter should be slightly larger than the beads so that they fit freely there. You can sew on a typewriter or by hand, using any convenient and strong seam. Then turn right-side up.
- Now you can put beads into the pipe. Insert one and secure with a knot. Anything can play the role of knots - additional plastic beads over fabric, a ribbon or other decorative elements.
- Insert each bead in turn, securing it to the product.
- Then you can sew the product into single beads without a fastener, if the diameter allows you to put it over the head. If the decoration is too small, you need to make a clasp. To do this, either use metal fittings or attach ribbons to the beads so that you can tie them.
Also, sling beads can be made by tying each bead with a crochet. This technique is more difficult as you need to knit well.
Such jewelry is usually worn by young mothers with small children. Sling buses help your baby develop fine motor skills and not get bored during feeding or long walks.
Original wool beads: wet felting
Wool decoration is the highlight of fashion shows. This accessory looks beautiful not only in winter, it can be used at any time of the year.
Before creating woolen beads, you should decide on the design and colors - the felt decoration should be in harmony with your clothes. A large selection of colors and styles will allow every woman to find the option that will perfectly match her wardrobe. Keep in mind that you will end up with large beads.
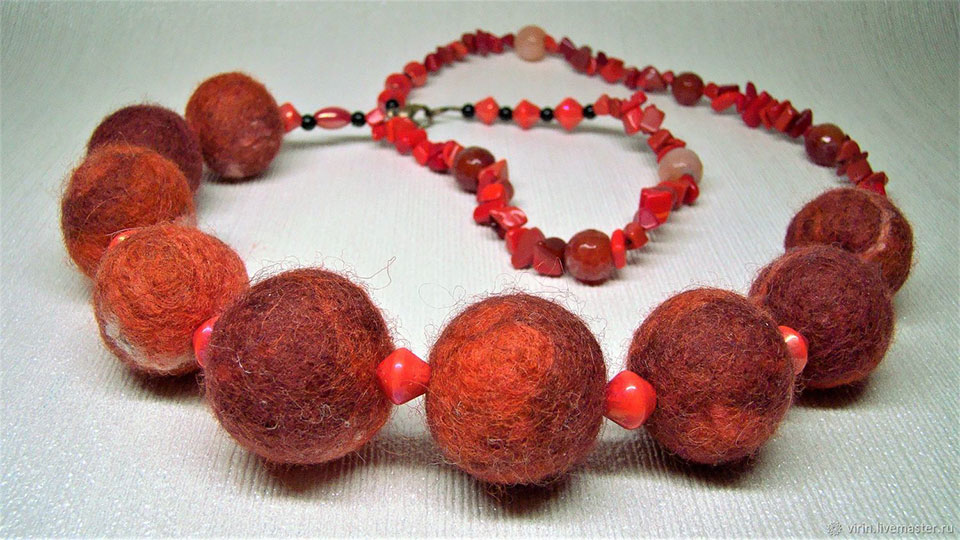
Here's what you need to create a malachite beads style wool jewelry:
- a combed ribbon of a beautiful green shade - uncombed wool is needed;
- wool of a darker or even black color - to create veins on the "stone";
- pimpled film;
- any container with hot water;
- liquid soap - preferably without cream additives and a pungent odor;
- towel;
- gypsy needle;
- thin knitting needle;
- narrow satin ribbon - beads will be collected on it;
- super glue or lighter - for processing the tape cut.
In this case, the clasp is not needed, as it will be replaced by a beautiful satin ribbon bow. It is important that you are free to put on and take off the jewelry, so take the ribbon with a large margin.
How to make wool beads:
- We make blanks for beads. To do this, pinch off thin long strands of green combed ribbon, two for each bead. The volume should be approximately the same so that the elements are even and similar. Take the first strand by the edge and roll it into a ball, wind the second on top - you should get a tight ball. Wrap very thin black strands on top, imitating veins. Do this with all the beads.
- Wet felting. Add liquid soap to a container of hot water and stir well to form a soapy solution. Now immerse the first ball in it, holding it slightly with your hand so that the wool does not fall apart. The future bead should be well saturated with water. After that, squeeze the ball a little and start rolling between your palms. Movements should be soft, without pressure. If a lot of foam appears, it can be removed by dipping the bead in water. To speed up the felting process, you can do it on a bubble wrap. As the ball becomes denser, you can push harder. If the bead has become hard and all the villi are firmly attached to the surface, you can proceed to the next step.
- Wash and dry. All finished beads must be rinsed in running water - first warm, then cold. Then roll each ball in your hands, slightly adjusting the shape. Now poke holes in each bead with a needle or fine knitting needle. You need to pierce them before drying, since then the wool will be too dense. You need to dry the balls on a knitting needle or toothpicks, it will take overnight drying. The next day, you can start assembling the jewelry.
- Assembly. Spread the beads out on a towel so they don't roll off anywhere. Then take the tape, cut the edge obliquely and treat it with glue or a lighter. Then, using a gypsy needle, string the beads one by one onto the ribbon.
In addition to woolen beads, you can use other elements made of wood, plastic or glass.
In this case, plastic beads made under "malachite" or pearl beads with a green tint will look beautiful.
This technique requires patience and certain skills, but it is definitely worth trying! And after a few training items, you will surely get a very beautiful and original decoration.
How to fasten the clasp on the beads
The clasp is required on most items, so you need to learn how to attach it to your jewelry. This can be done in various ways, depending on the accessories used and the amount of jewelry.
For example, crimps or crimp beads can be used on thin items. With them, making a fastener on the fishing line is easier than ever. To do this, take a carabiner and put it on the fishing line, forming a loop. One edge will be the base for the decoration, and the other will be the loose ponytail. Thread both ends into the crimp. Then clamp it with pliers, pushing it as close as possible to the lock. After that, two options are possible:
- immediately cut the tail as close to the creampie as possible, tying a knot;
- withdraw the tip through 2-3 beads and only there cut it off.
The second way is prettier and more reliable.
Protectors can also be used to attach the carabiner. These are special metal loops through which you can thread a cord or thread. To secure the lock to the thread in this way, take the cord or thread and thread it through the protector. Now you need to put a lock on the protector eyelet, and then clamp its edges with pliers. You can tie a knot on the thread or pull out the tip through 2-3 beads, and only then cut it off.
How beautiful to tie a line on beads without a clasp
If you don't want to fool around with the clasp, you can do without it. There are many ways to secure jewelry without a clasp. For example, the beads are based on a ribbon, then you can simply tie a beautiful bow. also long beads do not require a lock, but in this case the decoration should be continuous and a special knot will be required. One of the simplest options for attaching beads to a fishing line:
- Before stringing beads, measure the required length and make a margin of 5-10 cm.
- When you have put on all the elements, tie double knots at the ends.
- Then thread the last few beads in both directions and pull well.
- Now tie the double knots again, cover them with glue for security and cut off the excess.
If you want to tie a knot that will not come loose under any circumstances, then you can try the surgical method. To do this, take two ends of the thread in both hands and cross, as if you are going to make a regular knot. Do not tighten, but cross again. Then make a regular knot on top and tighten. The surgical knot is almost invisible, but does not slip or untie on its own.
Stylish beads for a child from scrap materials: a master class
Almost anything can be used to create children's beads. For example, pasta. Choose several options of different shapes at once: horns, bows, flowers - whatever you like.
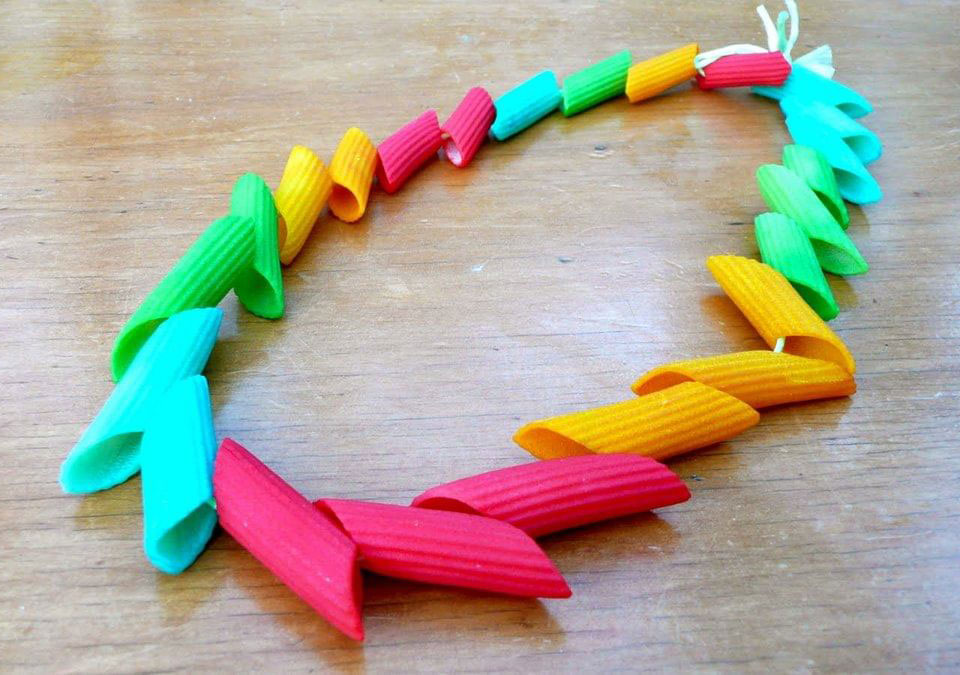
Then the pasta must be colored. To do this, follow the following algorithm:
- Add food coloring to the water - preferably liquid. Read carefully what is written on the packaging - for each manufacturer you need a different concentration.
- Pour the required amount of pasta into the container and leave for 7-10 minutes.
- Remove the pasta and dry it on plastic wrap.
When all the elements are dry, you can start assembling. You can string "beads" on a thread, cord, twine - the choice is yours. Arrange bright pasta in the order you want - as a result, you will get an original craft for the kindergarten!
If you want to make a more sophisticated piece of jewelry for a girl, you can create shell beads. This will require a dad and a drill with a 1,6 mm drill. Drill a hole in each shell, and then string it one by one onto the waxed cord. The shells can be painted or left unchanged. The result is a great summer vacation necklace!
You can also create a piece of junk material such as old buttons. To do this, you will need a handful of buttons of different sizes, shapes and colors, two strong threads of at least 90 cm long and a clasp.
The procedure is as follows:
- Tie the two pieces of thread with a regular knot. Attach the clasp at one end.
- Thread both sections through the same hole of the large button towards each other.
- Now take two small buttons, string them on either side of the large button.
- Thread the loose ends of the threads through the remaining holes of the small buttons and then the large one.
- Bring the buttons to the knot and pull tight. Tie a simple knot to secure the element.
- Repeat with all buttons.
At the end of the beads, do not forget to make a loop or attach a clasp ring.
If you do not know what to make beads from, you can search the Internet. There are many options available to everyone. In addition, it will be a great activity for the child, in which he can show imagination and creativity.
What can be made from old beads: alteration into new fashionable ones
If you have old beads lying around somewhere that you will never wear again, you do not need to send them to the trash heap - it is better to remake them into a new stylish piece of jewelry.
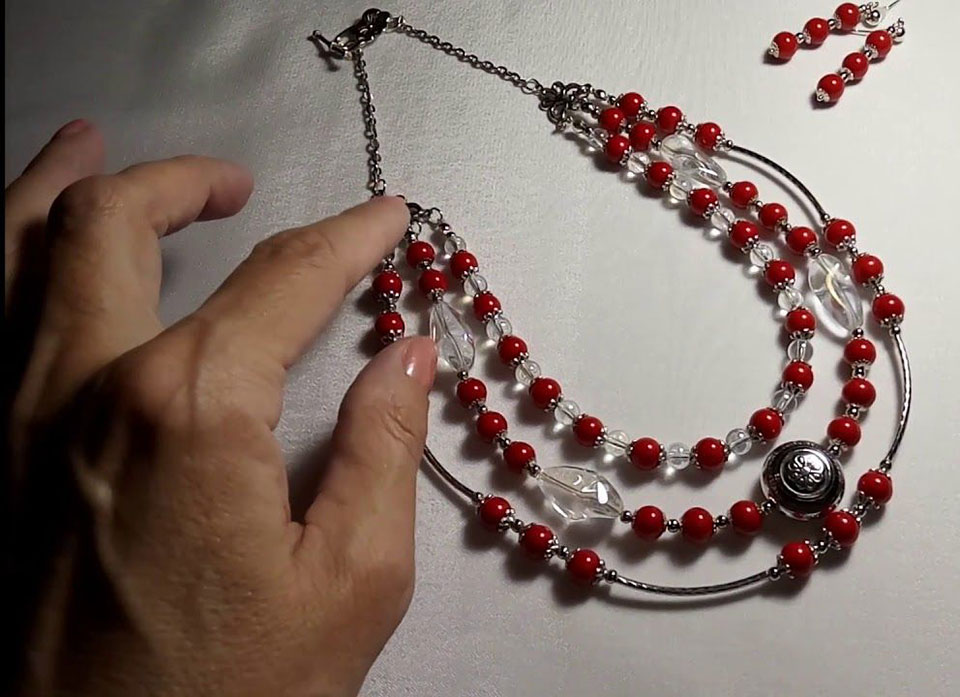
To do this, first disassemble the beads. If you have a thread with knots in front of you, you will have to cut each bead separately. The lock - if there is one - should also be left, because it will definitely come in handy for creating a new accessory.
Now you can make an original voluminous necklace from old beads. To do this, you will need:
- beads;
- jewelry carnations;
- "Hugs" for beads - hats that help them not to fly off the nails;
- chain;
- round teeth.
Procedure:
- Put a hug and then a bead on the nail.
- Bend the carnation to the side, cut off the excess and make a loop.
- Repeat with all the beads, there should be about 50.
- Now take a chain and insert 2-3 beads into each link. It is necessary to insert from the middle, starting with one bead. Then insert the second and only then the third. One for each link.
The stylish decoration is ready!
As you can see from this article, beads can be made from just about anything. In addition, many of the techniques are very simple and require little effort. And that means it's time to experiment and create! Good luck!
