Handmade items are in trend right now. It can be both decorative items for the home and handmade beaded brooches. Making them yourself is quite simple: with a good sketch and suitable materials, even a beginner can handle it.
Necessary materials
To embroider a beaded brooch with your own hands, you need to prepare materials for work. As a basis for embroidery, you can use felt about 1 mm thick. A good alternative to it is fabric or silk velvet. You can also embroider on a grid.
The mesh or fabric must be placed in the hoop in advance. Due to this, the embroidery does not deform when the thread is pulled.
You can embroider on felt of any color. But to make the background match the color of the decoration, it can be painted with acrylic paint.
There is a huge amount of materials for embroidery of the brooch itself. Usually brooch beadwork involves the use of:
- silk thread. It looks beautiful on the product and has an interesting sheen.
- Busin. The optimal diameter is 6 mm. They are required to decorate the product.
- felling. It is a faceted beads of small size. One of its main advantages is a beautiful overflow.
- sequins. The optimal size is 4 mm.
- Crystal. Opal is usually used, made in the form of a drop and having a characteristic haze. It is allowed to use several crystals of different shapes in one brooch.
Additionally, bicones (double cones) and a soft gimp, which is usually cut into small strips and sewn, may be required. It can be blue, black, red, green,
delicate white, pink, purple, orange or any other.
Many master class beaded brooches involve the use of pearls of different diameters.
Particular attention should be paid to the strass chain. There are very beautiful small chains, the size of which is 1,4 mm. There are larger products - 2 mm. You need to choose its parameters depending on the size and shape (round, square, triangular) of the brooch.
It is not necessary to use all these materials in one project: unusual ideas can be implemented from the required minimum. This applies to the manufacture of not only brooches for men, but also handmade children's jewelry.
To make a brooch with beads, it is recommended to use monofilament. It is universal in that it is transparent and inconspicuous. Against this background, it fits any color.
An important detail is the needle. You should not save on it: budget needles bend very quickly. Good needles are made of special steel, which is almost not subject to deformation. An embroidery needle should have a small eye: it should pass through any hole in the bead.
The brooch, embroidered with beads, has a reverse side. It can be made of felt, eco leather or genuine leather. The basis of the brooch is accessories. It is also not worth saving on it: low-quality and budget accessories have a very blunt needle, which, when piercing clothes, can leave an ugly hole on it.
Before sheathing the edge of the brooch with beads, it is required to give the product a beautiful, clear shape. This can be done with a hard wire. This material is optional, but highly recommended.
DIY beaded feather brooch
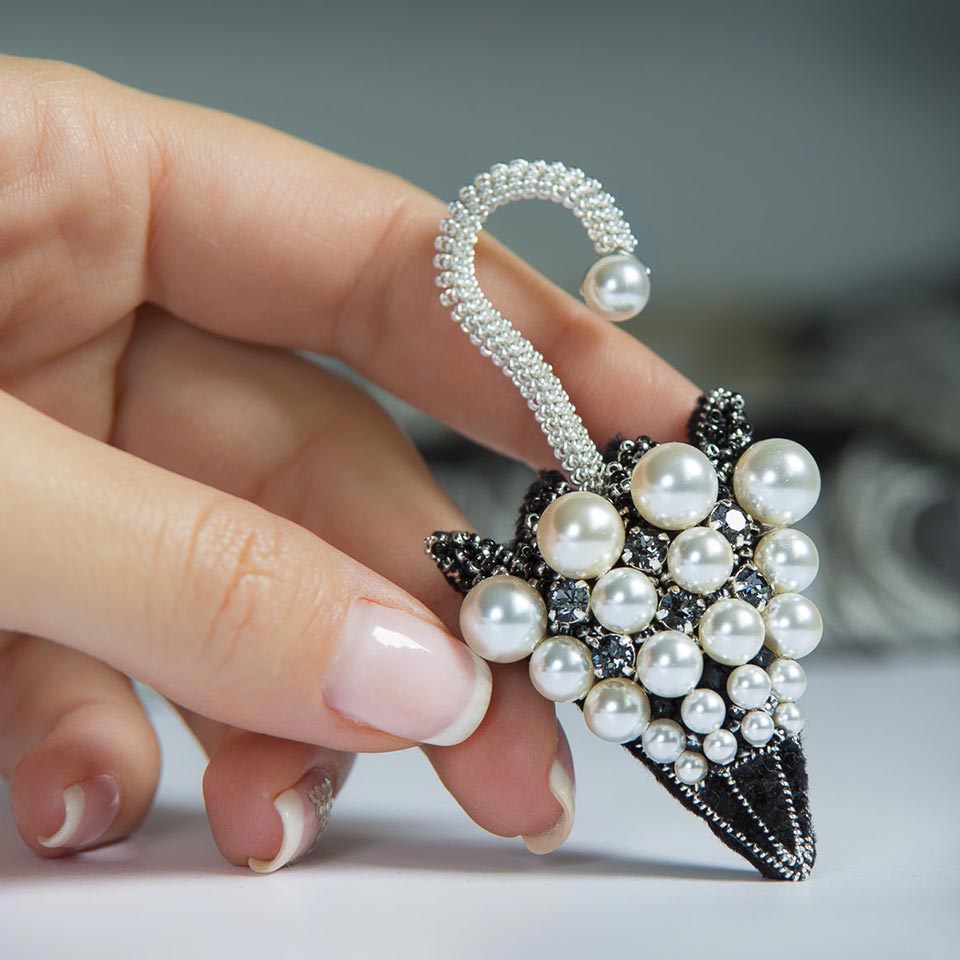
What do you need to make a feather brooch? The list of required materials includes a diagram (stencil, template or sketch). You also need to prepare:
- bronze rigmarole;
- rhinestones (optional);
- beads;
- pearl.
Weaving a beaded brooch step by step:
- Transfer the drawing to felt. This can be done with a white gel pen.
- Sew on the gimp. It should be stitched along the entire contour of the product. You don’t need to touch the middle - it will need to be processed with a rhinestone chain.
- Sew on strass chain. You can sew it on however you like.
- Divide the product into several sectors. For each of them, you will need to determine a small amount of beads and other elements. One of the sectors can be completely made of pearls. If there are gaps left, you can fill them in with a soft gimp.
Thus, it will be necessary to fill in all sectors. The upper sector can be made of glass beads. It is recommended to choose the material of the most interesting shade - for example, bronze-gold. Try to lay out the beads strictly along the gimp.
Another sector can be mixed. It can be laid out with the participation of a rigmarole and a rhinestone chain. That is, the first row should be made of a rhinestone chain, and the second row should be made of gimp.
The next sector can be decorated with bicones. They should be sewn neatly, in rows. The second row must be moved half a bicone up. It should be laid out like a puzzle. Those places where nothing else fits at all can be filled with beads.
The remaining sectors can be filled in as desired. Gaps are filled with matte beads.
After that, you need to cut the brooches along the contour. The next steps are processing the edge of the brooch with beads (optional) and attaching the clasp to the wrong side. The feather brooch is ready.
How to make a beaded brooch
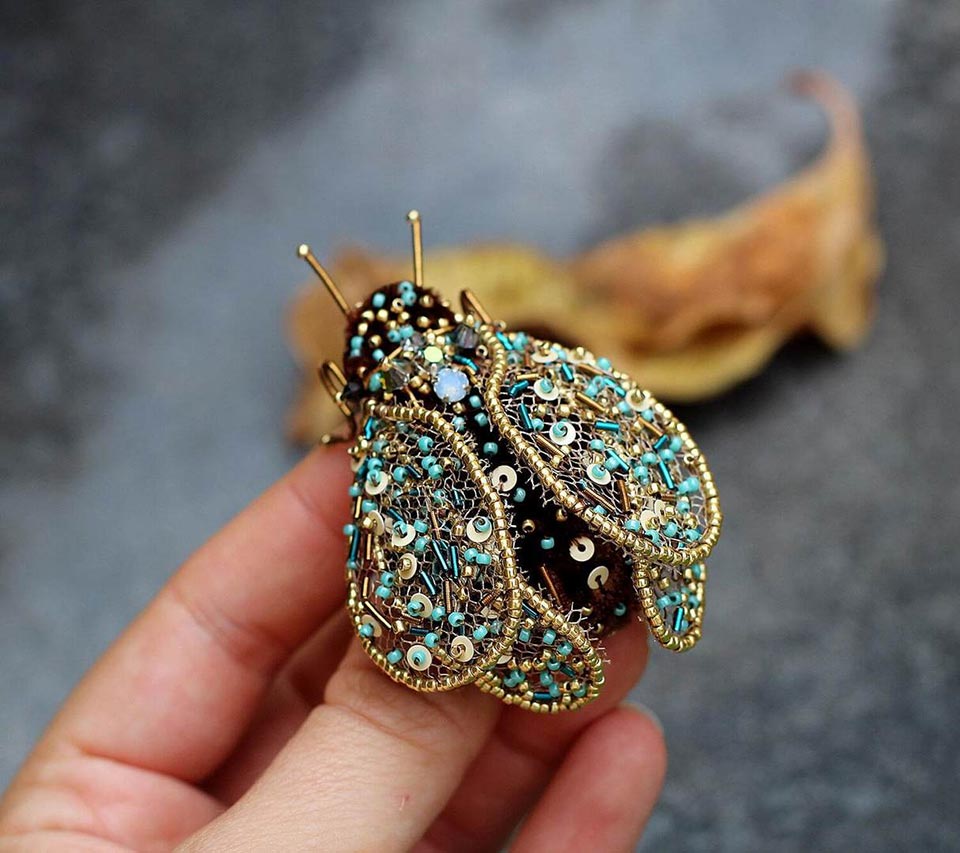
The trend is voluminous brooches in the form of beetles with wings. For the lower wings, you will need 0,5 mm thick wire (preferably stiff), tulle, rhinestone chain (2 mm), No. 10 beads and monofilament.
To make the upper wings of the beetle, you need to prepare felt 1-1,5 mm thick, rhinestones droplets 5x8 or 6x10 mm - 2 pcs., rhinestone chain 2 mm, pearls 4 mm, sequins 2 shades 4 mm, hard and soft gimp 1 or 1,2 mm, rondels 3x4 mm, beads No. 10, velvet or leather for the wrong side, as well as soft wire 0,5 mm.
For the body of the beetle, you will need the following materials:
- felt;
- rhinestone drop or oval 18x25 mm - 1 pc.;
- rhinestone round 10 mm - 1 pc.;
- natural or artificial fur;
- pearls 6 mm for the eyes - 2 pcs.;
- pins 5 mm - 4 pcs. (2 for whiskers, 2 for paws);
- pearl 3 mm;
- beads number 10;
- sequins 4 mm;
- cardboard;
- kapron threads No. 50;
- transparent glue "Moment";
- leather for the wrong side;
- basis for a brooch 3-3,5 cm.
To make a beetle, you need to transfer the pattern to the felt and cut out the figure. Next, you will need to sheathe it with a cantle and glue a large crystal on the insect's head.
Next, sew on the wings. To do this, you need to cut them out of felt and attach them to the body with threads. A suitable seam is forward with a needle. To make the beetle more voluminous, a cotton pad should be placed inside (in the space between the wings and the body)..
The next step is sewing on a rhinestone chain and marking the beads. Beads can be sewn on several pieces. You can combine several types of this material (glass beads, felling).
Next, you need to make paws and decorate them with beads, and then attach them to the base. The optimal number of paws is 6. Then you need to attach a fastener to the base. The brooch is ready.
Master class on making a beaded brooch-matryoshka
Very relevant is the brooch-matryoshka in the kokoshnik. To make it, you will need a cabochon, a sketch and everything that is required for needlework.
It is necessary to transfer the template to felt and glue the cabochon. Then the product must be processed along the contour with a cantle. Next, a rhinestone chain is sewn around the cabochon circle.
The next step is sewing on the crystal. After that, you need to embroider the brooch with beads, cut, sheathe the edges and attach the bartack. The matryoshka brooch is ready.
Beaded heart brooch: master class
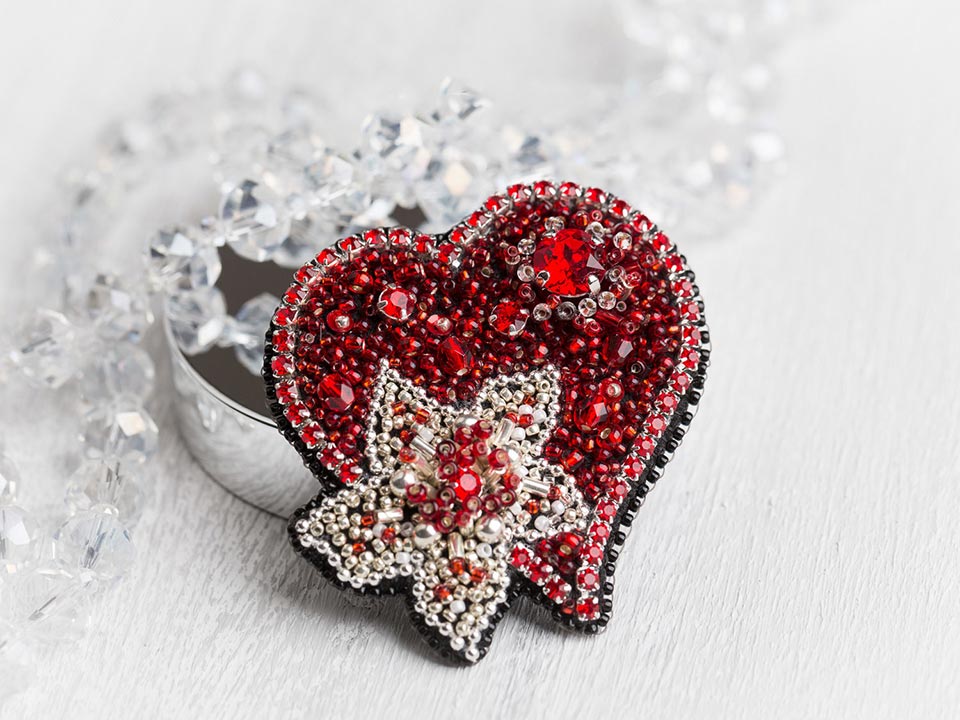
A heart brooch is a universal gift. It can go with absolutely everything, for any holiday, not tied to anything. To make an anatomical heart, you will need the following materials:
- rondels with a diameter of 2x3 mm;
- rondels with a diameter of 3x4 mm;
- rondels with a diameter of 5x6 millimeters;
- bicones 4x4 mm;
- rhinestones in caps are small;
- bicones with a diameter of 6x6 millimeters;
- beads with a diameter of 6 millimeters;
- fishing line or thread 1,5 meters;
- glass cabochon in caps.
First you need to make a layout and transfer it to felt.
To make a clear edge of the brooch, it must be sheathed with a hard thread. First, it should be stretched - so the monofilament will fall into each gap and the gimp will be sewn much better.
Then you need to try on beads and stones. Large parts must first be glued with strong glue. Then they need to be sewn with a few stitches. Do not forget to fasten the thread on the wrong side for reliability.
Next, you need to sheathe the product with beads. Then the heart must be carefully trimmed along the edge. The next step is to attach the hair clips on the back. Brooch-heart is ready.
in the form of letters
To make a brooch, you will need a layout of a suitable size. Relevant are layouts in the form of the letter "A", the letter "E", the letter "M", the letter "O" and the letter "D". You will also need a smooth rigmarole, beads of any shape, small crystals and rhinestones.
First you need to transfer the sketch to the felt and sheathe it along the contour with a cantle. Then a rhinestone chain is sewn on. After that, you need to fill in the letter. You can use not only beads, but also crystals, as well as pearls.
Next, you need to cut out the letter and sew it along the edge with a hard thread. After that, you can make the wrong side with a bartack.
DIY beaded lips
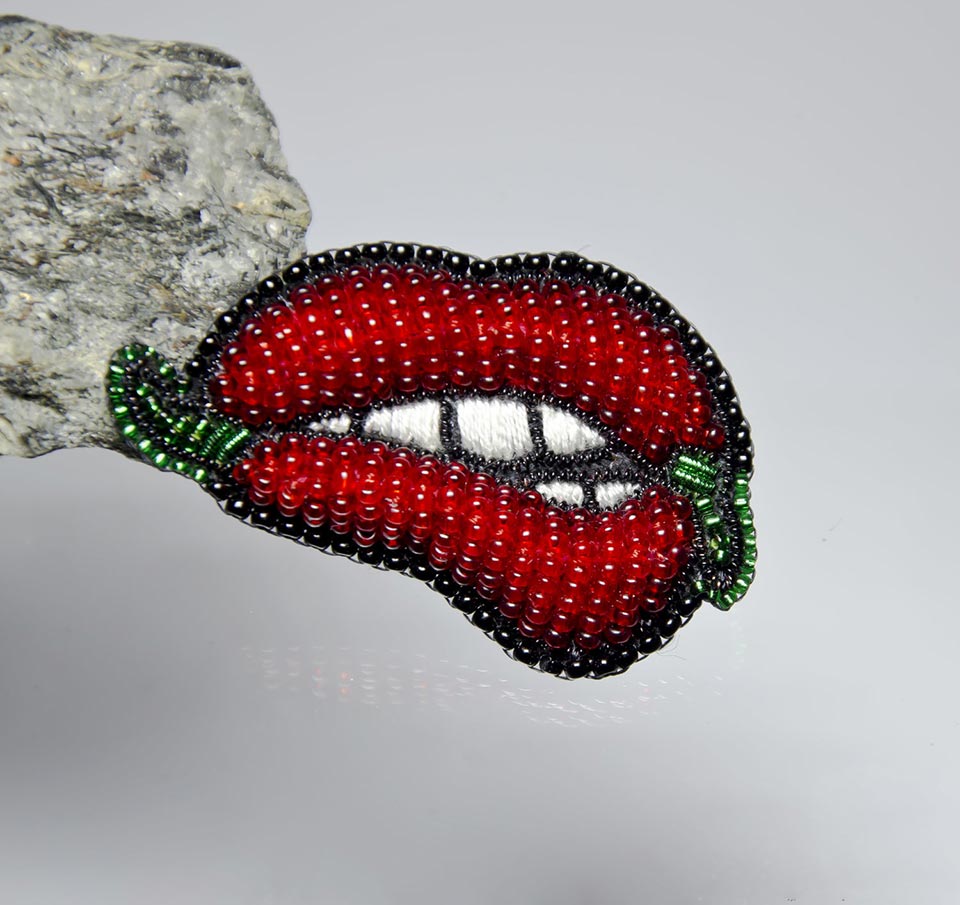
Brooches in the shape of voluminous lips are in trend. The advantage of this decoration is that its manufacture does not involve the use of a large number of different materials. To make beaded sponges, you may need the following:
- round beads of red and pink color, size 10/0;
- black floss threads;
- monofilament GAMMA 0.12 mm;
- hard gold thread 1.5 mm;
- instant glue;
- hoops;
- felt fuchsia 2 mm;
- crimson guttermann thread (although any strong thread in the color of beads and felt can be suitable);
- needle;
- gel pen (can be replaced with a chalk or pencil);
- cardboard;
- clasp;
- clamp;
- sketch.
Prepare a sketch and cut out the layout. Upper and lower lip should be separate. Next, cut off the unnecessary felt. For each lip you need to make three patterns. The main patterns will be the usual size, and each subsequent one will be slightly smaller (about 1-2 mm). This creates a volume effect. Next, the resulting structure must be sewn. You need to do this with a few stitches - you don’t need to tighten the felt strongly. Otherwise, the volume effect may disappear. To get a pattern of open lips, between them in the free space you will need to walk stitches with a black floss thread.
The next step is sewing the gimp along the contour: this will help emphasize the clarity and beauty of the product. Next, you need to dial the required amount of beads (the first and last bead should completely cover the workpiece) and sew.
Next, you need to cut the workpiece along the contour, attach the base and backtack to it.
Cat
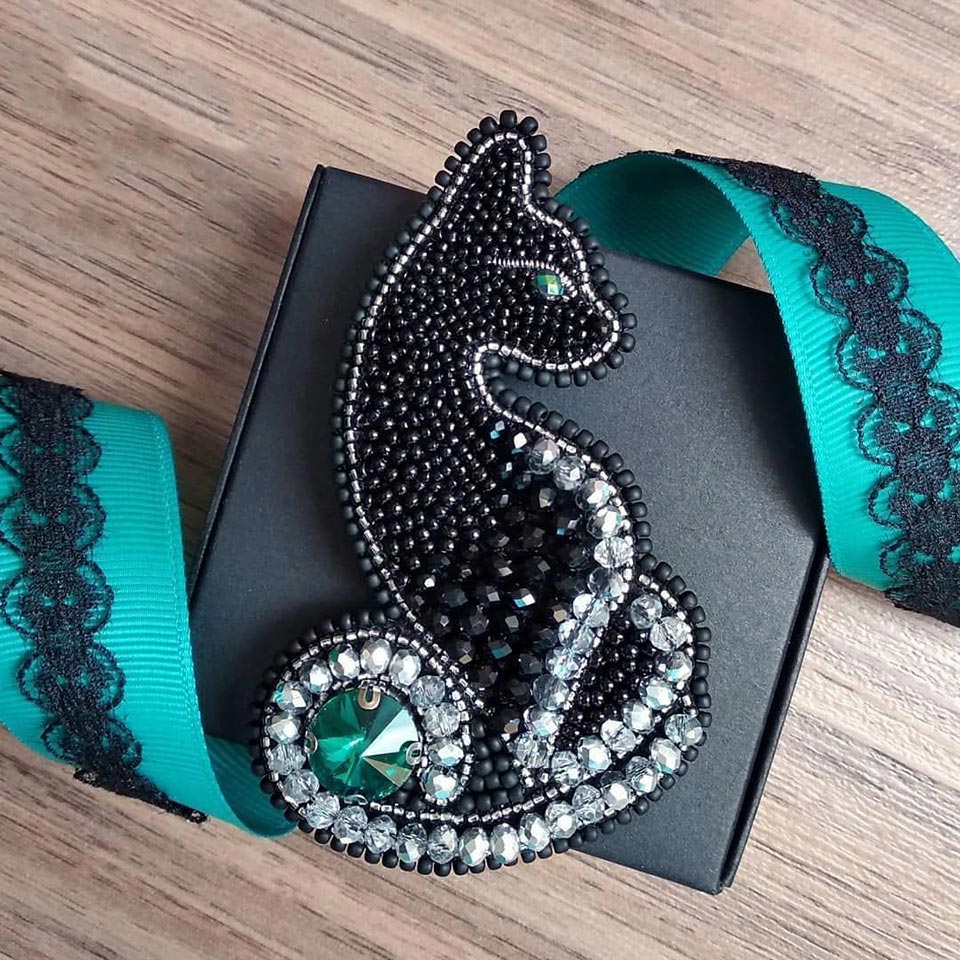
You can make both an ordinary stylish black cat and a Cheshire cat. To make a brooch, you will need to take interlining, leather, cardboard, beads No. 10, bicones 4 mm (120 pcs.), The basis for the brooch (pin), a needle for beads, thread for beads, fishing line, a template in the shape of a cat, glue, pencil and scissors.
The first step is to transfer the sketch to the felt. The contour of the cat and her eyes need to be sheathed with black beads. After that, in a chaotic manner, you need to fill the figure with beads. In addition to beads, you can (and should) use black bicones.
Next, the figure needs to be cut out and sheathed along the contour with a rigid cantle. After that, you need to make a base with a backtack. The cat brooch is ready.
Garnet
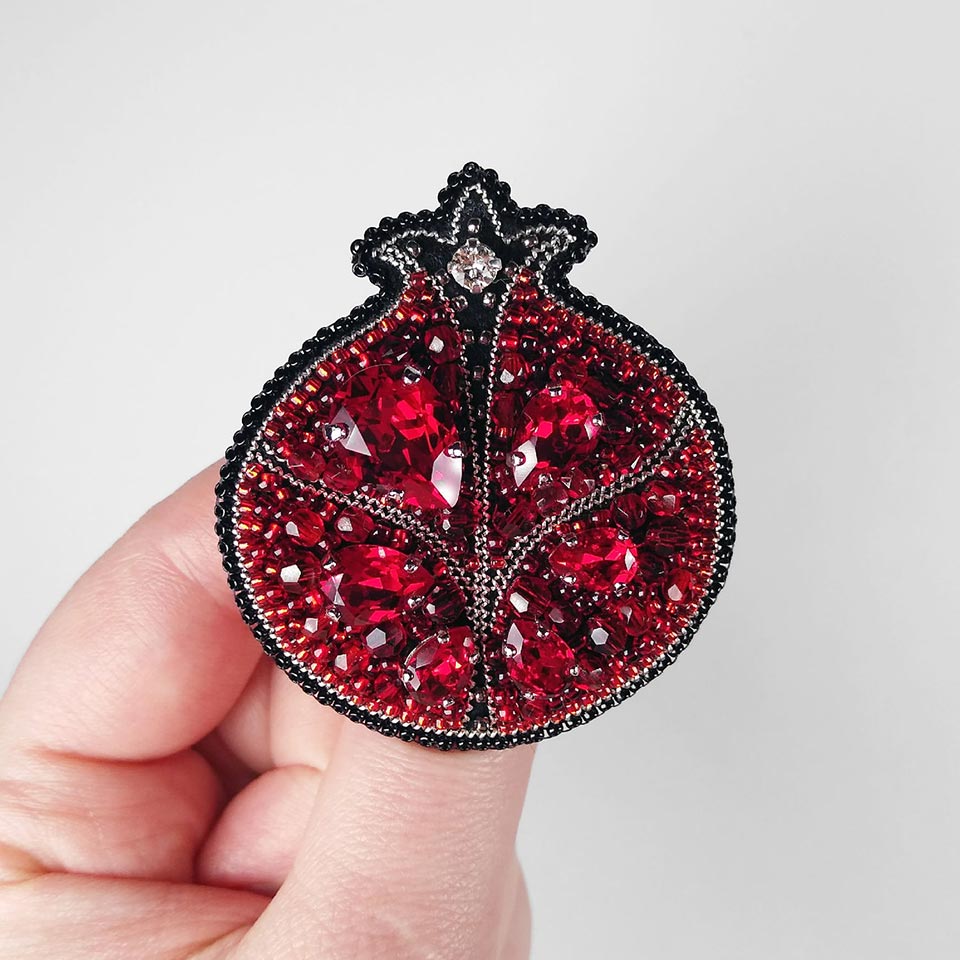
To make a pomegranate brooch, you need to transfer a sketch of the decoration onto hard felt. Next, you need to make the light part of the pomegranate. To do this, you need either acrylic paint or a lighter and thinner felt. After that, the product should be sheathed along the contour with a hard brown thread.
The next step is sewing on bright red beads. Attach them to the grenade in rows. Next, you need to sew on beads. They need to fill all the free space. Beads also need to be sewn in rows. The remaining space can be filled with either beads or floss threads. After that, you need to cut out the figure and process the edges. The final stage is attaching the base with a bartack. The pomegranate brooch is ready.
Unicorn
The unicorn brooch is a classic. To make it, you need to cut out a unicorn figurine from paper and transfer it to felt. Then it needs to be partially painted - acrylic paint is used for this. If necessary, you can use colored polymer clay to make jewelry details.
After that, you need to sew the gimp - first along the contour, and then use it to work out all the internal lines. After that, you can sheathe the product with beads (selected to taste). In addition to beads, you can use beads of different colors. After that, you need to cut out the figure and attach a hairpin on the back.
Umbrella
To make an umbrella brooch, you will need a suitable stencil and felt 1-1,5 mm thick. You will also need the following materials:
- acrylic paints for fabric;
- gimp, rondels 4 mm (violet shades);
- rhinestones (chatons 8 mm) - 2 pcs. purple hues;
- sequins 4 mm;
- pearl 4 mm;
- beads purple light and dark 3-4 shades (No. 11);
- mix TONO;
- copper wire 0,5 mm - 15 cm;
- kapron threads No. 50;
- cardboard;
- basis for a brooch 35 mm;
- glue "Moment-Crystal";
- leather for the back.
Transfer the pattern to felt and carefully cut out the figure along the contour. First of all, a rigid rigmarole is laid out.
For greater graphics, it is recommended to give preference to black gimp. To lay out the figured lower edge of the umbrella, it is necessary to stretch the gimp more than usual.
After that, you will need to fill the figurine. First, larger beads are sewn on, and then small beads. Colors are chosen according to your taste. Having filled in all sectors of the umbrella, you need to carefully cut out the shape along the contour, stitch along the edges with a hard cantle and attach a clasp on the back. The umbrella brooch is ready.
A fox
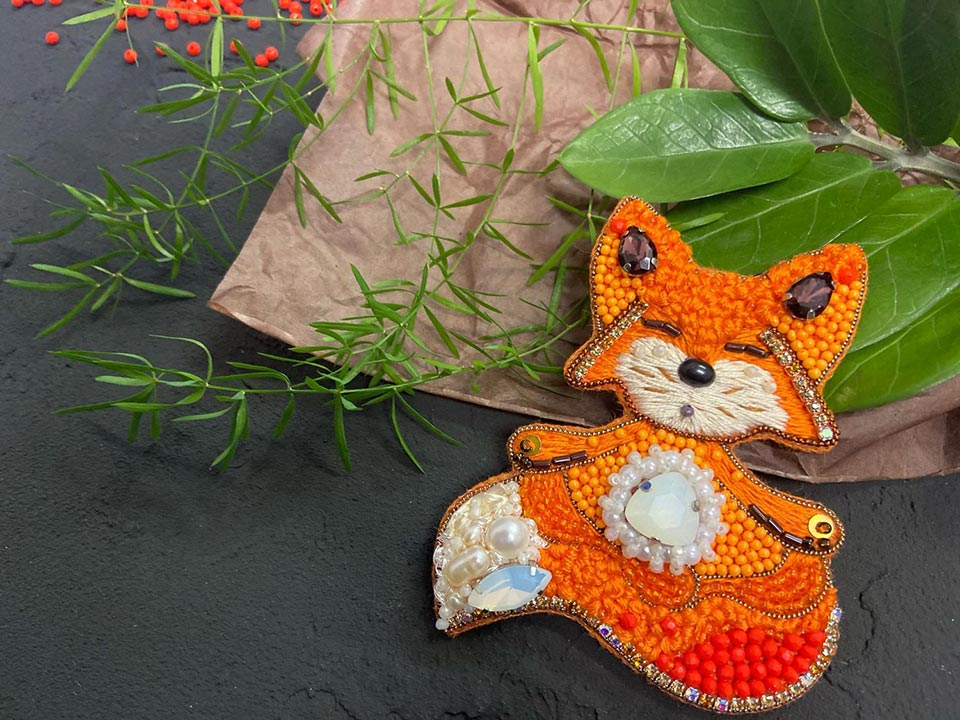
The fox brooch goes with any modern look. She looks interesting and unusual. To make a brooch, you will need the following materials:
- Toho beads, size 11;
- Preciosa beads, size 10;
- glass bead Zlatka, GBA-02, color 01, size 4, 2 mm;
- faceted glass bead abacus, dark orange, 6,4,2 mm;
- 2 crystals in caps (orange and transparent, 10*7 mm each); strass chain 2mm, color orange;
- felt hard 1mm;
- cardboard;
- eco-leather;
- monofilament Gamma MF-04, 0,12, 100% nylon, white;
- blank for a brooch 4,5 cm;
- acrylic paint Pebeo white and black;
- acrylic varnish “Sonnet” (glossy and matte);
- cotton buds;
- chenille (orange and white);
- gimp (golden 1mm and orange 1,5mm).
You need to start with a template. It should be cut out and circled on hard felt. After that, you need to draw the eyes of the animal. To do this, one end of a cotton swab must be dipped in white acrylic paint. If the edges are uneven, they can be corrected with a thin brush. The same is done with the rainbow. It can be made in green or yellow. Next, you need to circle the eyes with a thin brush in black and draw eyelashes.
Next, with black acrylic paint, you need to draw the ears, and white - the muzzle and the tip of the tail.
After that, in the hoop, you need to sew the fox on the felt. Then you need to sew a rhinestone chain along the contour. Next, the crystals are glued and sewn on. On the inside of the chain, you need to sew a gimp - this will create a clearer line. After that, you need to fill the figure with beads.
Next, you need to remove it from the hoop, carefully cut along the contour, and attach a hairpin on the back side.
Leaf brooch
First you need to prepare a sketch of the leaf. It can be a maple leaf, an oak leaf, or a monstera leaf.
Then you need to cut out the figures from felt and lay out the outline with a cantle. After that, you need to add a strass chain. Next, the largest beads are sewn on (to keep them better, they should first be put on glue). Then smaller beads and beads are sewn on. Next, the figure must be cut out, processed its edges and attached to the wrong side of the bartack. The brooch is ready.
